
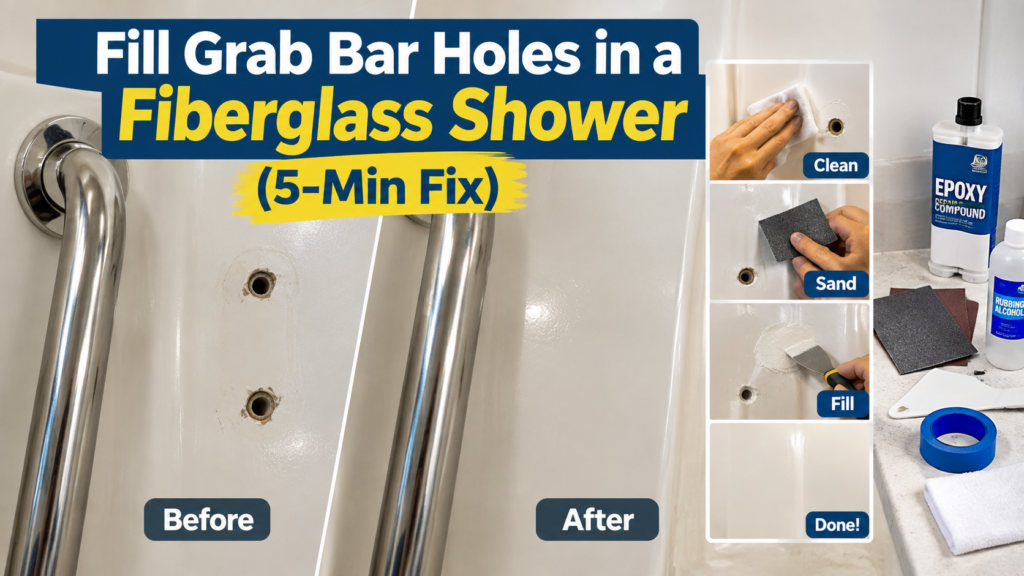
Introduction
Fill Grab Bar Holes in a Fiberglass ShowerYou just pulled an old grab bar off the wall, and now you’re staring at two, three, or four empty screw holes in your fiberglass shower. Good news: this is a straightforward weekend fix, not a call-a-contractor problem, as long as the holes are small.
Table of Contents
Quick Answer: Fill grab bar holes in a fiberglass shower with a two-part epoxy filler, not caulk or spackle. Clean and dry the area; rough up the gelcoat with 120-grit sandpaper; mix and press the epoxy into each hole; then sand it flush once cured (usually 30–60 minutes). Holes over 1 inch or cracked at the edges need fiberglass cloth reinforcement first.
What You Need to Know
- Two-part epoxy filler is the only material that actually bonds to fiberglass gelcoat long-term — silicone caulk and drywall spackle will fail, and marine repair manuals like West System’s fiberglass repair guide confirm epoxy is preferred over polyester filler for adhesion and durability.
- Small screw holes (under 1/4 inch) take one epoxy application and about an hour of working time.
- Holes larger than 1 inch, or any hole with cracks radiating from it, need a fiberglass cloth patch underneath the filler.
- You can usually reinstall a grab bar in a repaired spot, but it’s better to shift the new holes an inch or two over.
- This is a DIY-friendly repair for small holes. Cracks that go through to the shower’s backing material are a job for a fiberglass repair professional.
Can You Fill Grab Bar Holes in a Fiberglass Shower Yourself?
Yes, small grab bar holes are one of the easiest fiberglass repairs a homeowner can do. Fiberglass shower walls are built from a gelcoat surface over a resin-and-fiberglass shell, and that gelcoat is designed to be patched—it’s the same basic repair process used on boat hulls and RV panels.
The job gets harder, not impossible, once a hole is bigger than a fist or the surrounding gelcoat is cracked. The size of the hole, not the location, is what determines whether the repair stays a DIY job.
What You’ll Need
You can usually find most of these supplies in a typical bathroom or garage:
- A two-part epoxy repair compound, preferably marine- or automotive-grade, available in a dual-cartridge or two-tube package
- 120-grit and 220-grit sandpaper for smoothing and finishing the repaired area
- Rubbing alcohol or acetone, along with a clean cloth for removing dirt and residue
- A plastic spreader, putty knife, or an old plastic card for applying the filler
- Painter’s tape to protect the surrounding fiberglass surface
- Fiberglass mesh or cloth for larger openings, especially holes wider than 1 inch
- A matching gelcoat or suitable spray finish if you want the repaired spot to blend closely with the surrounding shower surface
How to Fill Grab Bar Holes in a Fiberglass Shower (Step-by-Step)
Step 1 — Prepare the Surface
Begin by cleaning the damaged spot and the area around it. Apply rubbing alcohol or acetone to a fresh, clean cloth and wipe roughly 3–4 inches around the hole. Make sure there is no soap residue, grease, dirt, or moisture remaining. If water has entered the opening, allow the area to dry completely before moving on.
Step 2 — Create a Rough Bonding Surface
Take 120-grit sandpaper and gently dull the glossy finish around the hole. Sand an area extending approximately 1 inch beyond the opening. You are not trying to remove a large amount of material; the purpose is simply to give the repair compound a textured surface to adhere to. Good surface preparation can make a major difference in how well the patch holds.
Step 3 — Fill the Opening With Epoxy
Prepare the two-part epoxy according to the directions supplied with your particular product. Since epoxy begins hardening after the components are combined, have your tools ready before mixing. Use a plastic putty knife to force the compound into the hole and fill it completely. Leave a small amount of extra material above the surface rather than trying to make it perfectly level immediately.
Step 4 — Cure and Smooth the Repair
Give the epoxy enough time to harden based on the manufacturer’s recommended curing period. Some products may become firm enough to sand within an hour, while complete curing can take considerably longer. Once the filler is ready, switch to 220-grit sandpaper and gently level the repaired spot using small, controlled movements. Continue until the repair is even with the surrounding fiberglass, then remove the remaining sanding residue with a clean cloth.
Filling Large or Cracked Holes (Different Method)
A screw hole from a removed grab bar behaves differently than a hole where the bar pulled out of the wall under weight—the second one is usually larger and often has hairline cracks running outward from it. Cracked or oversized holes need a fiberglass cloth layer underneath the epoxy, or the patch will flex and eventually pop out.
| Hole Size | Likely Cause | Best Filler | Reinforcement Needed? |
|---|---|---|---|
| Under 1/4″ (single screw hole) | Old grab bar removed cleanly | Two-part epoxy filler | No |
| 1/4″–1″ | Stripped screw, minor gouge | Epoxy filler, then gelcoat topcoat | No |
| Over 1″, or cracked edges | Bar pulled out under load | Fiberglass cloth soaked in resin, then epoxy and gelcoat topcoat | Yes |
Save or screenshot this hole-size chart — it tells you in one glance whether your repair needs reinforcement before you buy anything.
How Long Before You Can Reinstall the Grab Bar
Most two-part epoxy fillers are sandable within an hour but don’t reach full structural cure for up to 24 hours – check the specific product’s label, since cure times vary by brand and bathroom humidity. Waiting the full cure time matters most if you’re drilling new holes back through the same patched area, since a soft patch won’t hold a screw thread.
Reinstalling Your Grab Bar in the Right Spot
Once the patch has cured, you have two options: reinstall through the same spot or shift the new holes slightly to land in fresh, unpatched gelcoat and hit the wall stud cleanly. Either way, matching the drill bit to your specific screw and wall anchor matters more than most people expect — get that wrong and you’re back here filling holes again in a year. Federal accessibility guidance from the U.S. Access Board’s bathing room standards also confirms that grab bars need to anchor into a structural wall, not just the fibreglass shell, to safely support body weight.
For the exact bit size to use for your anchor type, see our guide on choosing the right grab bar drill bit size.
Common Mistakes (and Why They Fail)
- Using silicone caulk instead of epoxy. Caulk stays flexible and never gains real structural strength, so it works loose the first time water pressure or a towel bump hits it.
- Skipping the sanding step. Epoxy applied straight onto glossy gelcoat has almost nothing to grip, and the patch can peel out within weeks.
- Drilling new holes before the epoxy fully cures. A screw driven into an under-cured patch strips the material instead of biting into it.
- Ignoring cracks radiating from the hole. Filling just the hole and leaving the cracks unaddressed lets water behind the gelcoat, which can lead to a soft, spongy wall over time.
FAQs
How do I fill in holes in a fiberglass shower?
Clean the hole with rubbing alcohol, sand a ring around it with 120-grit sandpaper, then mix and press in a two-part epoxy filler. Let it cure for 30–60 minutes before sanding it flush with 220-grit paper. For holes over 1 inch, add a fiberglass cloth layer before the epoxy for extra strength.
Can you put grab bars on a fiberglass shower?
Yes. Grab bars can be mounted directly to fiberglass shower walls as long as the screws anchor into the wall stud behind the fiberglass, not just the fiberglass shell itself. Mounting into the shell alone, without hitting a stud, is the most common reason grab bars eventually pull out.
How to fill big holes in fiberglass?
Holes larger than about 1 inch, or any hole with cracks around it, need a layer of fiberglass cloth soaked in resin placed over the hole before you apply epoxy filler on top. This reinforcement layer is what keeps a large patch from flexing and failing under weight, unlike small screw holes that don’t need it.
What not to use on a fiberglass shower?
Avoid silicone caulk, drywall spackle, wood filler, and standard painter’s putty — none of them bond permanently to fiberglass gelcoat or hold up to repeated water exposure. Two-part epoxy filler made for fiberglass or marine use is the only material built to bond correctly here.
How long does fiberglass shower filler take to dry?
Most two-part epoxy fillers become sandable in 30–60 minutes but need up to 24 hours to reach full cure, depending on the product and your bathroom’s humidity. Check the specific filler’s label for its exact times, and wait for full cure before drilling new screw holes into a patched area.
Should I hire a professional instead of doing this myself?
Small screw holes from a removed grab bar are a reasonable DIY job for most homeowners. Call a fiberglass repair professional if the crack extends more than a few inches, if you can see or feel the backing material through the hole, or if the wall feels soft or spongy around the damaged area.
What to Do Next
Once your holes are patched and cured, the next step is getting your new grab bar mounted securely and in the right spot. Start with our guide to choosing the right grab bar drill bit size so you don’t strip the new holes, and if you’re replacing a bar that pulled loose, our piece on removing a grab bar without cracking the tile covers how to avoid this exact problem next time.