
Introduction
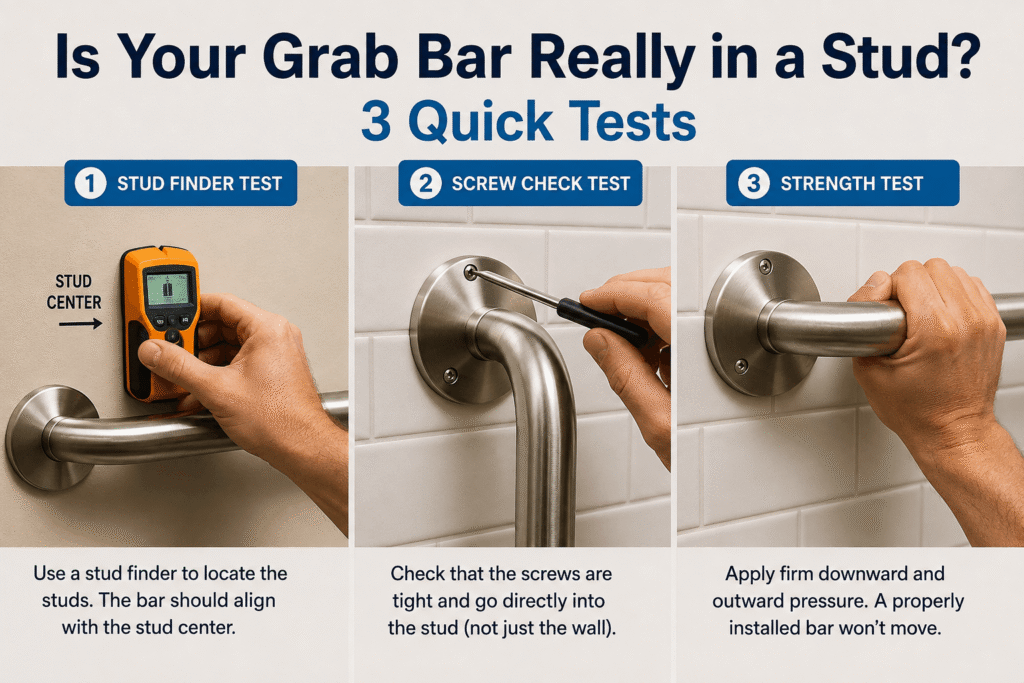
Is Your Grab Bar Really in a Stud? You leaned on the grab bar to test it, and it moved. Or maybe it didn’t move, but you’re still unsure if that screw actually caught the stud or just bit into the drywall. Either way, you want a real answer before you trust this bar with your weight—or someone else’s.
Table of Contents
Quick Answer: Tap along the wall in 1-inch increments — a stud sounds solid and dull, while hollow drywall sounds sharp and hollow. Then apply firm downward and outward pressure on the installed bar for 10 seconds. A bar anchored in a stud won’t move, flex, or crack the wall surface around the mounting flange.
What You Need to Know
- Studs are typically spaced 16 inches apart on centre, which narrows your search quickly once you find the first one.
- A stud finder can misread through tile because of adhesive thickness and backer board — tapping is a reliable backup check.
- The accessibility industry’s structural benchmark for grab bars is 250 lbs of force at any point on the bar, fastener, or wall.
- A drywall-only mount often fails months later, not on day one — this is why testing right after installation matters.
- If you can’t confirm a stud, don’t let anyone rely on that bar for full body weight until it’s reinforced.
What You’ll Need Before You Start
A few basic tools make this whole process faster and more reliable. You’ll want a stud finder (electronic or magnetic), a pencil for marking, and nothing else fancy—the tap test only needs your knuckle.
If you’re testing a bar that’s already installed, you won’t need any tools at all for the tug test. That one relies entirely on your hands and a close look at the mounting flange.
Tap the Wall Before You Trust Any Reading
A solid, dull knock means wood behind the wall. A sharp, hollow knock means an empty cavity.
Start about 6 inches to either side of where the grab bar is mounted or where you plan to mount it. Use your knuckle, not your fingertip—fingertips are too soft to feel the difference clearly.
Move in small steps, tapping every inch. The sound noticeably deepens and flattens out when you cross onto a stud. Mark that spot with a pencil the moment you hear it change.
Keep tapping past that first mark, too. Studs run vertically the full height of the wall, so once you’ve located one, you can trace its edges top to bottom instead of guessing where else along the same stud you can drill.
The Stud Finder Test — And Where It Gets Fooled
Electronic stud finders read density changes, and tile throws that reading off more often than people expect.
Hold the stud finder flat against the wall and slide it slowly, without lifting it, until it signals a stud. Confirm the reading by sliding in from the opposite direction—a true stud triggers the signal from both sides at roughly the same spot.
Thick tile, mortar bed, or cement backer board can all delay or blur the signal. If your stud finder gives you a wide or inconsistent reading on tile, trust the tap test over the tool.
Magnetic stud finders work differently — they locate the screws already holding drywall to the stud rather than the stud’s density. These tend to be more reliable through thin tile but slower to use since you have to sweep a wider area.
The 10-Second Tug Test
Once the grab bar is installed, this is the check that tells you the truth — not just where the stud is, but whether the screw actually caught it.
Grip the bar and apply firm, steady pressure downward and outward, as if you were putting your full weight on it, for a full 10 seconds. Watch and listen at the mounting flange, not just the bar itself.
| What You Observe | What It Means |
|---|---|
| No movement, no sound | Secured into a stud |
| Slight flex, no wall damage | Likely in blocking or a heavy-duty anchor — verify anchor rating |
| Visible flex plus a hairline crack around the flange | Drywall-only mount — not safe for full weight |
| Bar rotates or twists under pressure. | Screws have stripped, or the anchor has failed. |
Save or screenshot this table — it covers the four outcomes you’ll run into on almost any wall type.
Do this test on both ends of the bar separately, not just in the middle. A bar can be perfectly secure on one side and loose on the other, and pressing only in the centre can mask that difference.
Do Grab Bars Have to Be Installed in a Stud?
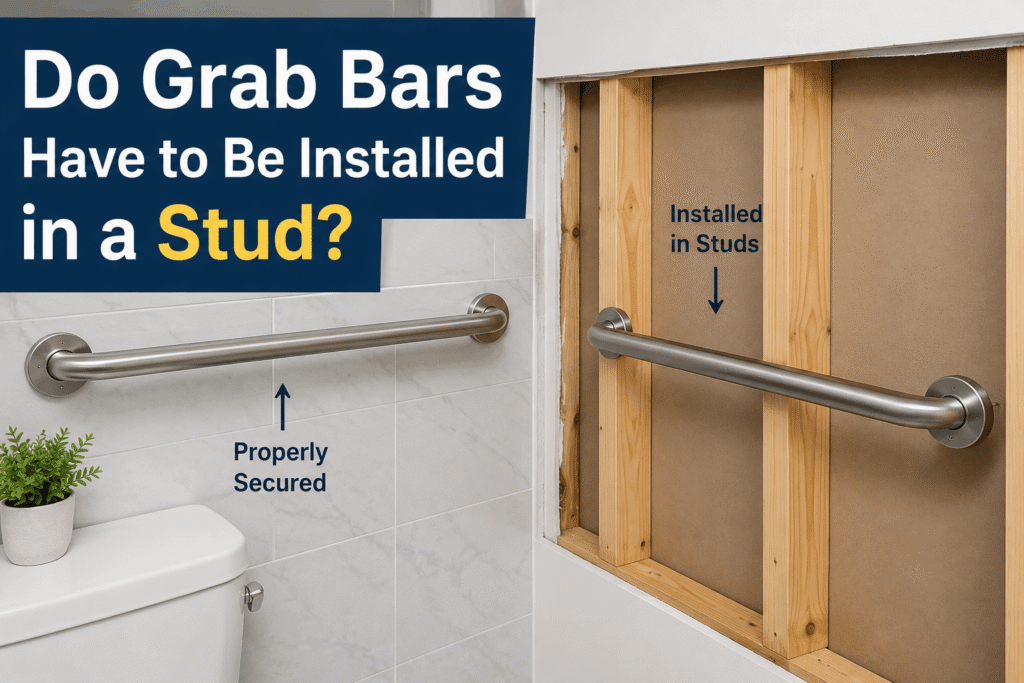
No, but the alternative has to be engineered to match a stud’s strength, not just approximate it.
Standard drywall anchors are never sufficient on their own. If a stud isn’t available in the right spot, the accepted alternatives are solid wood blocking added behind the wall before the tile goes up or heavy-duty toggle-style anchors rated for the load. According to the U.S. Access Board’s accessibility guidelines, the bar, fasteners, and supporting wall structure together must withstand 250 lbs of force at any point — that requirement doesn’t relax just because a stud wasn’t available.
Blocking is usually the stronger long-term option of the two, since it’s installed during construction or renovation and becomes part of the wall’s structure. Heavy-duty anchors are the practical choice when the wall is already finished and opening it up isn’t realistic.
Common Installation Mistakes That Look Fine at First
A grab bar can look perfectly installed for weeks and still be unsafe. These mistakes don’t show up until someone actually leans on the bar hard:
- Hitting the edge of a stud instead of the centre—the screw catches enough wood to feel tight by hand but pulls loose under real weight.
- Over-tightening screws into tile—this can cause a hairline crack in the tile around the flange without anyone noticing until later.
- Mixing one stud-mounted end with one drywall-only end — the bar feels stable in a quick check because one side is solid, but the weak end still fails under a side-loading force.
- Skipping the tug test after installation—most failures get discovered when someone falls, not when the installer checks.
- Using screws that are too short — even a stud-mounted bar can fail if the screws don’t penetrate deep enough into the wood behind the wall surface.
FAQs
Do grab bars have to be installed in a stud?
Not strictly, but the mounting must be engineered to handle the same 250 lbs of force a stud-mounted bar would handle. That means solid wood blocking or manufacturer-rated heavy-duty anchors, never standard drywall anchors alone.
What are the most common grab bar installation mistakes?
The most frequent issues are catching the edge of a stud instead of its centre, over-tightening screws into tile until it hairline cracks, and mounting one end into a stud while leaving the other unsupported in drywall.
How do you find a stud behind the tile?
Tap the wall in 1-inch increments and listen for the sound to change from hollow to solid. Confirm with an electronic stud finder from both directions, since tile thickness can sometimes delay or blur the reading.
What happens if a grab bar isn’t anchored in a stud?
Without a stud or an equivalent engineered anchor, the mount can pull loose under sudden weight, exactly when someone is depending on it most. The bar may hold light pressure for months before failing under a real fall.
What weight should a properly mounted grab bar support?
A correctly mounted bar should withstand 250 lbs of force applied at any point without any give in the bar, fasteners, or wall—that’s the structural minimum set by the U.S. Access Board, not a maximum.
What are the signs of a loose or failing grab bar?
Watch for any wobble when pressure is applied, a hairline crack forming around the mounting flange, a screw that spins freely instead of tightening, or a faint creaking sound during use.
What to Do Next
If you haven’t drilled yet and want to confirm you’re using the right hardware for your wall type, check the drill bit size guide for bathroom grab bars.
If your stud search missed and left extra holes in a fiberglass surround, here’s how to fill grab bar holes in a fiberglass shower cleanly.
If this test told you a bar has to come down, see how to remove a grab bar without cracking the tile before you start.