
Introduction
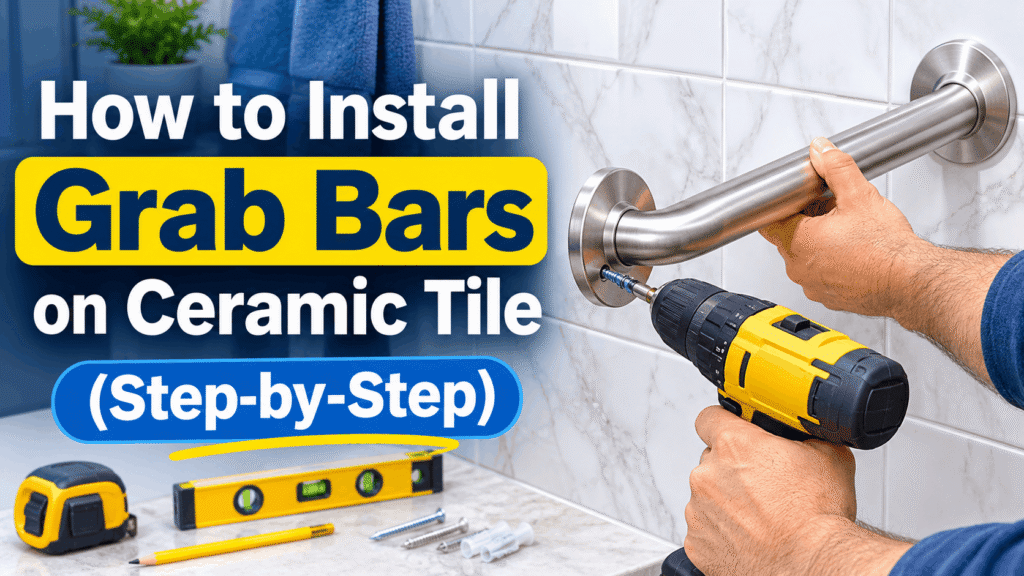
How to Install Grab Bars on Ceramic Tile You have identified the correct location for a grab bar, but then you recalled that the wall is made of ceramic tile. Yes, you can mount a grab bar on tile, but the tile itself will not provide the necessary support.
This guide shows how to find the stud, pick the drill bit, and avoid a cracked tile. If you haven’t chosen a bar yet, our comparison of the best stainless steel grab bars for showers shows what to look for first.
Table of Contents
Quick Answer: To install a grab bar on ceramic tile, find a wall stud with a stud finder, mark the flange holes, and tape over them. Drill with a carbide-tipped or diamond bit at low speed, with hammer mode off, then drive screws 1.5–2 inches into the stud. No stud? Use a grab-bar-rated hollow-wall anchor.
Renting, or can’t drill? Suction grab bars for small bathrooms exist, but they are balance aids only, not weight-bearing supports.
What You Need to Know
- The stud holds the bar, not the tile. The tile only has to survive the drilling.
- Use a diamond bit for porcelain and natural stone. Carbide works only on soft glazed ceramic.
- Turn hammer mode off. Percussion is the most common cause of cracked tile.
- No stud in the right place? Use anchors made for grab bars, never plain wall plugs.
- Mounting height is 33–36 inches above the floor, measured to the top of the bar.
Can You Put a Grab Bar on Ceramic Tile?
Yes. A grab bar on ceramic tile is safe when its screws reach a wood stud or a grab-bar-rated anchor behind the tile. Tile and the board under it are too weak to carry a falling adult.
The stakes are real. According to a CDC-archived study of older adults at high risk of falling, falls in the bathroom were more than twice as likely to cause injury as falls in the living room (CDC study). The authors point to safety changes such as grab bars.
The fear of cracking tile is also fair. That is why the steps below spend most of their effort on drilling.
What’s Behind Your Tile?
Identify the wall first, because it decides your fastener. Behind ceramic tile you will find one of three things: a wood stud, a hollow cavity, or a solid mortar or concrete backer.
A stud finder with a deep-scan mode can read through roughly an inch of tile, according to home-improvement experts. Older homes sometimes have a tile set on a concrete backer instead. In that case a lead shield, a soft-metal insert set into the drilled hole, can take the screw.
Tapping gives a hint, not proof. A hollow, drum-like sound suggests an empty cavity. A dull, solid sound suggests a stud or a mortar bed. Confirm with the stud finder before you drill.
Studs are often 16 inches apart, centre to centre. A bar long enough to span two studs gives you two solid anchor points.
What Drill Bit Do You Need for Ceramic Tile?
Use a diamond bit if you are unsure. Diamond bits grind through ceramic, porcelain and stone, while carbide-tipped bits suit only softer glazed ceramic. A diamond bit is a drill bit coated with industrial diamond grit, used to cut very hard, brittle materials without fracturing them.
| Tile or job | Recommended bit | Why |
|---|---|---|
| Soft to medium-glazed ceramic | Carbide-tipped (spear or arrowhead) | Cheaper and effective on softer glazes |
| Porcelain | Diamond | Porcelain is denser and harder, so it needs grinding, not cutting. |
| Natural stone | Diamond | Leaves a cleaner edge |
| Hole for a hollow-wall anchor | 1/2 in diamond, if your anchor kit calls for it | Hole size is set by the anchor. |
A 1/2 in diamond bit is generally rated for tile 1/2 in thick or less. Thicker tile or natural stone is a reason to call a professional.
Bit and screw sizes differ by kit. One manufacturer lists a 1/4 in bit for its anchors and a 3/16 in bit for its longer screws, so check your own instructions.
Tools and Materials
- Stud finder (deep scan if possible)
- Level and pencil
- Painter’s tape or masking tape
- Drill with variable speed
- Diamond bit, or carbide-tipped bit for soft ceramic
- Wood bit for the pilot hole into the stud
- Spray bottle or wet sponge for cooling the bit
- Hand screwdriver
- 100% silicone sealant
- Safety goggles and gloves
- Grab bar with its screws (and hollow-wall anchors if there is no stud)
Where Should You Mount a Grab Bar?
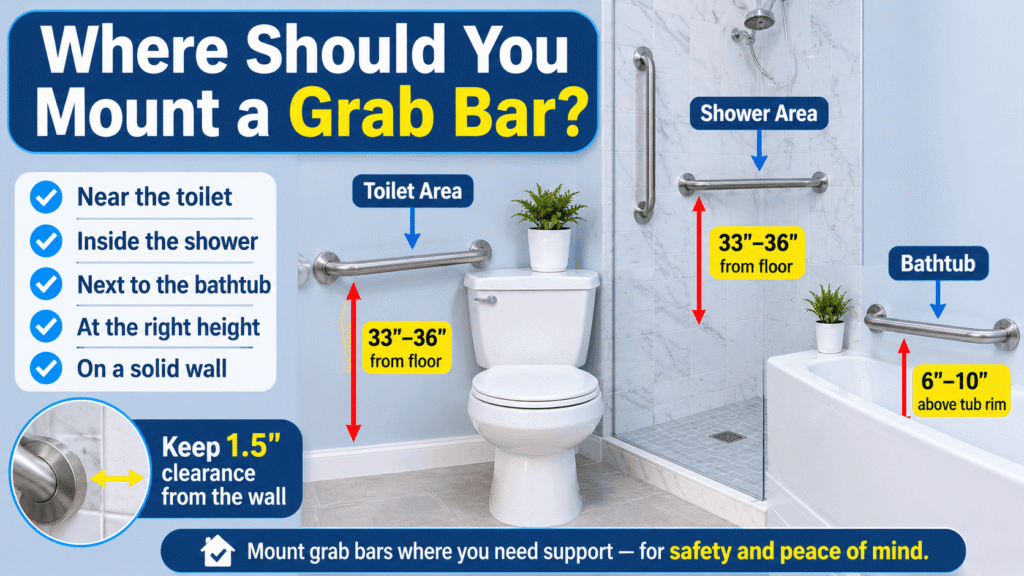
Mount a horizontal bar 33–36 inches above the shower floor. The 2010 ADA Standards set that range and also require the bar, its fasteners, and the wall behind it to withstand 250 pounds of force. See the U.S. Access Board’s ADA Standards for the section on grab bars and its bathing room technical guide for shower context.
In a private home you are not bound by the ADA, but the numbers make sensible targets.
Here is the surprising part. The 250-pound requirement covers the whole system, including the supporting structure. A listing that says “500 lb capacity” tells you about the metal tube, not about your wall.
Users also differ in height and reach. Have the main user stand in the shower and reach before you mark anything. If your shower is acrylic rather than tile, see how to install a grab bar on an acrylic tub surround.
How Do You Install a Grab Bar on Ceramic Tile? (7 Steps)
Follow these in order. The sequence protects the tile: tape first, drill slowly with water, and tighten last by hand.
- Find the stud. Run the stud finder across the wall and mark the stud edges. Choose a position where the bar’s screws land in the stud’s center. Check for wiring or plumbing before you drill, especially in older homes.
- Mark the holes. Hold the bar against the wall, set it level, and mark the center of each mounting hole on the tile with a pencil.
- Tape the tile. Press painter’s tape over each mark. Glazed tile is slippery, and the tape gives the bit something to grip so it does not skate and scratch.
- Drill through the tile. Set the drill to standard rotary, never hammer. Start the bit at about a 45° angle, then straighten to 90° as it bites. Use low speed and light pressure, and keep the bit wet. Once through the tile, switch to a wood bit and drill the pilot hole into the stud.
- Seal the flange. Apply a bead of 100% silicone to the back of each mounting flange. This blocks water from running down the screw into the wall.
- Mount the bar. Drive screws 1.5–2 inches into the stud. Make the last turns with a hand screwdriver so you can feel resistance and avoid over-tightening against the tile.
- Test it. Pull and push the bar firmly. It should not move at all. Then wipe off excess sealant and snap on the flange covers.
Let the silicone cure as the tube directs before the first shower.
How Do You Drill Holes in Tile for Grab Bars?
Drill slowly, with water, and with the hammer mode off. Heat and vibration are what crack tile, so low speed and cooling matter more than force. Start at an angle, straighten as the bit bites, and pause to re-wet the bit.
What if there is no stud?
Use a hollow-wall anchor built for grab bars, and anchor at least one end into a stud if you can. Ordinary plastic plugs and standard toggles are not safe for this job. A grab-bar anchor expands behind the wallboard and spreads the load over a larger area.
Installer guides for toggle-style anchors suggest two holes per mounting end, so four anchors for one bar. They also note the anchor needs roughly 1-7/8 inches of clear space behind the wall.
One detail separates a good job from a leaky one. When you fit the flange cover, leave a small gap along the bottom edge so water that gets behind the cover can drain out.
Choose the bar and the anchors together. Our guide to the best stainless steel grab bars shows which bars ship with anchors and which list their 500 lb figure only for stud mounting. [AFFILIATE LINK: hollow-wall anchor kit rated for grab bars]
Tile × Wall Decision Chart
| What’s behind the tile? | Bit | Fastener | Stop and call a pro if |
|---|---|---|---|
| Wood stud | Carbide (soft ceramic) or diamond | Screws 1.5–2 in into the stud | Stud finder results conflict, or wiring is possible. |
| Hollow wall, no stud | Diamond, sized to the anchor kit | Grab-bar-rated toggle anchor | Tile is thicker than 1/2 in or is natural stone. |
| Mortar bed or concrete backer (older homes) | Diamond | Lead shield | The backer sounds cracked or crumbly. |
Save or screenshot this Tile × Wall Decision Chart. It covers which bit and fastener to use before you pick up the drill.
Want it as a one-page printable checklist? Join the Grab Bars Guide newsletter, and we’ll send it to you.
Common Mistakes and Troubleshooting
The most common mistake is drilling with hammer mode on. The percussion that helps in brick shatters ceramic glaze.
- Using a masonry bit on porcelain. It burns out and can crack the tile. Switch to diamond.
- Skipping the tape. The bit skates and scars the surface before it cuts.
- Mounting into tile and board only. The bar may feel fine at first, then loosen. Reach a stud or a rated anchor.
- Forgetting the silicone. Water runs along the screw into the wall and can rot the wood behind it.
- Over-tightening with the drill. Finish by hand.
If the tile cracks, stop, and do not mount the bar over the crack. Move the bar to a new spot or have the tile replaced.
If the bar wobbles, the screw has missed the stud, or an anchor is spinning. Our guide on why a bathtub grab bar gets loose walks through the fixes.
When Should You Call a Professional?
Call a professional if you cannot confirm what is behind the wall. A grab bar is a safety device, so a doubtful install is worse than none.
Hire help in these cases:
- The tile is over 1/2 inch thick, or it is natural stone.
- You suspect wiring or plumbing behind the spot.
- The stud finder gives unclear readings.
- The wall feels soft, crumbly or damp.
This guide is based on manufacturer installation guidance and published standards, not on professional contracting experience.
FAQs
Can you put grab bars on ceramic tile?
Yes. A grab bar can be mounted on ceramic tile if the screws pass through the tile into a wood stud or a grab-bar-rated anchor. The tile is not the support. Drill with a carbide-tipped or diamond bit, keep hammer mode off, and test the finished bar for any movement.
How do you install shower grab bars on tile walls without studs?
Use hollow-wall anchors made specifically for grab bars, such as toggle-style anchors, and follow the kit’s hole size. Drill with a diamond bit, set the anchors, and seal the flange with silicone. Ordinary wall plugs are unsafe. Anchor at least one end into a stud when possible.
How do you drill holes in tile for grab bars?
Tape over the mark, set the drill to standard rotary, and start the bit at about 45°. Straighten to 90° as it bites, using low speed, light pressure and water to keep the bit cool. After the tile, switch to a wood bit for the stud.
What drill bit is needed for ceramic tile grab bar installation?
A diamond bit is the safest choice and works on ceramic, porcelain and stone. A carbide-tipped bit can work on soft, glazed ceramic. Avoid masonry bits on porcelain. Check your anchor kit for hole size, since sizes vary by product.
How much weight can a tile-mounted grab bar hold?
The 2010 ADA Standards require grab bars, fasteners and supporting structure to withstand 250 pounds of force. Sellers often list 500 lb, but that describes the bar. The real limit is the weakest link: the screws, the anchors or the wall.
How do you hang a shower caddy on tile?
A shower caddy is not a safety device, and it will not hold a person. Never use a caddy or towel bar as a grab bar. If you want support for stepping in or out, install a proper grab bar into a stud using the steps above.
What to Do Next
- Pick your bar: compare the best stainless steel grab bars before you drill.
- Decide on grip: see textured vs smooth grab bars for wet-hand grip.
- Using a fiberglass shower? Read our guide to the best grab bars for fiberglass showers.