
Introduction
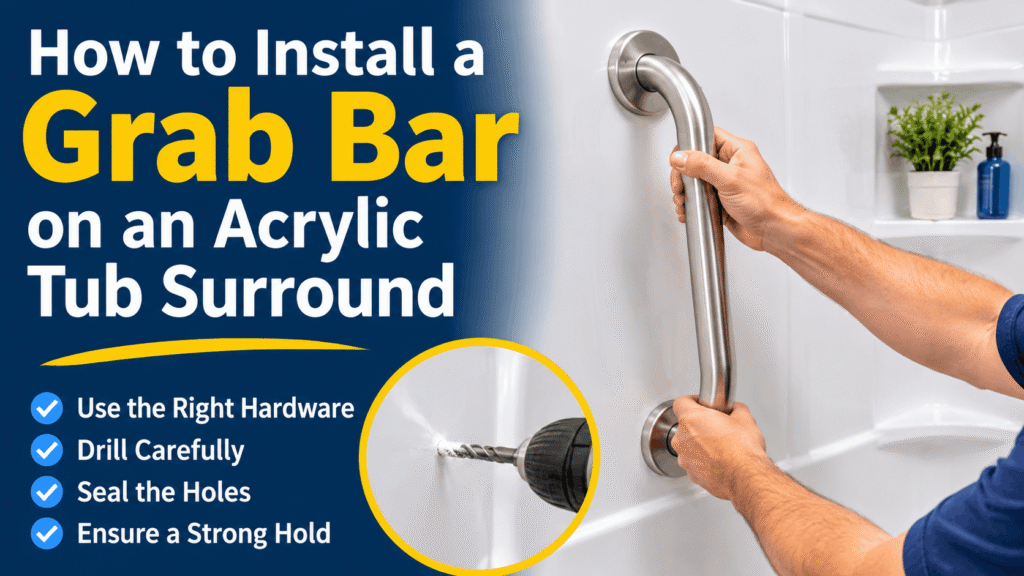
How to Install a Grab Bar on an Acrylic You’ve bought the grab bar, but the acrylic tub surround flexes under your palm, and nothing on the box says whether that wall can hold a falling adult. It can in specific cases, and this guide shows you how to find out. You’ll run five checks, pick the mounting route that fits your wall, and install the bar without cracking the panel or letting water in behind it.
Quick Answer: To install a grab bar on an acrylic tub surround, use a fastener its maker lists for acrylic, such as a hollow-wall type rated for ¼-inch surrounds, and confirm about 3½ inches of open space behind the panel. Standard screws and anchors rely on a flexing shell. If any of five pre-checks fails, don’t drill.
Table of Contents
What You Need to Know
- Acrylic surrounds are thin shells that can flex, so ordinary screws and drywall-type anchors are the wrong tool.
- Hardware makers publish the walls they approve. WingIt’s lists ¼-inch acrylic and fiberglass surrounds for its GBW40 fastener. Moen’s SecureMount sheet lists ⅛- and ¼-inch fiberglass.
- Five checks decide go or no-go: material, thickness, flex, open space, and condition.
- A bar’s rating is not the system’s rating. The ADA’s 250-pound benchmark covers the bar, fastener, mounting device, and supporting structure together.
- If your wall fails, reinforce it, replace it, or use a different support. Don’t drill anyway.
Can you install a grab bar on an acrylic tub surround?
Yes, but only under conditions. Acrylic tub surrounds are thin plastic shells that often stand off the framing and flex, so ordinary screws may not carry a fall. A bar holds when you use hardware approved for your exact surround or when it is fastened to solid backing behind the panel.
An acrylic tub surround is a plastic wall liner used to waterproof and finish the walls around a tub. Contractors and home-improvement retailers commonly advise against mounting bars on surrounds that stand away from the wall behind them.
The fastener and the wall behind it decide whether the bar holds, not the number printed on the bar. According to the U.S. Access Board’s guide to ADA bathing rooms, the 250-pound force requirement applies at any point on the grab bar, fastener, mounting device, or supporting structure. The ADA mainly covers public and commercial buildings, so at home it works as a benchmark, not a rule.
What should you check before you drill into an acrylic surround?
Run five checks: material, thickness, flex, open space behind the panel, and condition. A surround that passes all five may accept a listed fastener. Each check compares your wall with a number the hardware maker publishes.
| # | Check | How to do it | Go if | Stop if |
|---|---|---|---|---|
| 1 | Material | Look for a brand label, a rim stamp or the original install sheet. | The hardware listing names your material (acrylic or fiberglass) | You can’t identify it, and the maker can’t confirm it |
| 2 | Thickness | Measure the panel edge at a faucet or spout cutout. | Matches the listing: ⅛–¼ in (Moen, fiberglass) or ¼ in (WingIts, acrylic/fiberglass) | Thinner or unlisted |
| 3 | Flex | Press firmly with your palm at the planned spot, then 6 inches away. | Slight give with a hollow-wall fastener, or a firm panel with bonded backing | Crackling, visible bowing or a spongy feel |
| 4 | Open space | Probe a small pilot hole (later covered by the flange) with a bent wire. | About 3½ in clear, with no pipe, wire, stud or adhesive bead in the footprint | Shallower cavity or any obstruction |
| 5 | Condition | Look and feel for soft, cracked, discoloured or wet spots; note curves and ribs. | Dry, flat, undamaged | Wet, deteriorating, curved or ribbed at the spot |
Save or screenshot this acrylic surround go/no-go table. It shows in five checks whether your wall can take a bar before you pick up a drill.
Want the five checks as a one-page printable? Join the newsletter and we’ll send the Acrylic Surround Pre-Install Checklist.
Check 1: Is the surround really acrylic?
Hardware manuals list acrylic and fiberglass separately, so the material matters. If you can’t identify yours, treat it as an unknown shell and ask the surround’s maker before drilling.
Check 2: How thick is the shell?
Moen’s SecureMount instruction sheet (INS10306A) lists ⅛-inch and ¼-inch fiberglass tub surrounds and calls for 3½ inches of open space behind the wall. WingIts lists ¼-inch acrylic and fiberglass surrounds for its GBW40 fastener, which ships with a 4-inch screw for walls up to 1¼ inches thick. Measure the total wall thickness too.
Check 3: Does the panel flex?
Flex alone doesn’t disqualify a wall. It decides which hardware suits it, because a hollow-wall fastener tolerates it and plain screws don’t.
Check 4: Is there open space behind the panel, and is it clear?
Installers are told to check for plumbing, wiring, and adhesive beads or ribbing inside some tub surrounds. Find the framing too; our guide to finding studs behind a tub wall covers the methods.
Here is the counterintuitive part. WingIts’s data sheet says to confirm there are no studs where its fastener goes and to stay at least 1½ inches from a stud’s edge. A hollow-wall fastener wants an open cavity, not wood.
Check 5: Is the wall sound?
WingIts warns never to install any fastener into wet or deteriorating walls. A soft patch near the tub means a wall repair comes first.
Which mounting route fits your surround?
Pick the route by what the checks found: a listed hollow-wall fastener (Route A), solid backing (Route B), or no drilling at all (Route C). Route A is the usual fit for a finished surround you don’t want to open up.
- Does the surrogator pass all five checks, and does a fastener list your material and thickness? Take Route A. A hollow-wall grab bar fastener is an anchor whose wings spread open behind the wall panel and clamp it, used where no stud sits behind the bar’s mounting points.
- Can you reach the back of the wall, or is the surround being replaced? Take Route B. Add wood blocking between the studs (a common approach is ¾-inch plywood about 6 inches wide), then mount with hardware that bridges any gap between panel and backing.
- Neither applies? Take Route C. Stop drilling and see the alternatives below.
How do you install the bar, step by step?
Follow your hardware’s own sheet first; this is a summary of Route A. Plan on about 90 minutes of hands-on work for one bar (an estimate), plus sealant cure time.
- Match the parts on paper. The bar’s sheet and the fastener’s sheet must list each other and your surroundings. WingIt’s tells you to confirm compatibility with the company before pairing its fastener with another maker’s bar.
- Mark the height and level it. Run painter’s tape where the bar will sit. The ADA benchmark puts the top of the gripping surface 33 to 36 inches above the floor. Tubs also get a lower back-wall bar 8 to 10 inches above the rim.
- Map what’s behind the panel. Scan for studs, and keep each fastener footprint at least 1½ inches clear of a stud edge. Tub walls often hold supply lines, so check for those too.
- Probe the cavity. Drill a small pilot hole only where a flange will cover it. Push in an L-shaped wire and twirl it; nothing should catch. WingIts describes this exact test.
- Cut the mounting holes. Tape over the spot, keep the drill at low speed without hammer action, and use light pressure. Use the hole size of your sheet names. WingIt’s calls for 1¼ inches at each flange centre. Stop if a hairline crack starts.
- Seal and set the fastener. Moen’s plates carry a water-resistant gasket, and its sheet says to fill gaps on uneven surfaces with silicone. WingIt’s faceplate has waterproof adhesive; you back the centre screw out about the wall’s thickness, insert it, pop the wings behind the panel, then pull and tighten. Stop at Snug, because plastic cracks.
- Mount the bar, let the sealant cure, then test. Many silicones need about 24 hours, so the label governs. Push down, pull out, and twist; the bar shouldn’t shift, click, or flex. A hand test only exposes a bad install, so recheck monthly.
What can you do if your surround fails the checks?
If drilling into the wall isn’t possible, consider changing the installation approach rather than compromising safety. Never use a suction-cup grab bar as a replacement for a securely mounted bar when someone relies on it to push up or support their body weight.
- Install wall reinforcement. If the wall can be opened or accessed from behind, add suitable blocking to provide a secure fixing point.
- Choose a reinforced tub surround. Contact the manufacturer to find out whether a compatible model has built-in reinforcement for grab bar installation.
- Consider a clamp-on tub rail. Before purchasing, confirm that it fits your tub’s rim, check its rated weight capacity, and follow the manufacturer’s installation instructions.
- Consult an occupational therapist. A professional can recommend appropriate support equipment and positioning based on the user’s mobility and bathing routine.
- Use suction-cup bars only for light balance assistance. They should not be used to lift, pull up, or support full body weight. Check the manufacturer’s safety instructions for every product, including those discussed in our Best Grab Bars for Seniors guide.
Where should the bar go, and should it be angled or straight?
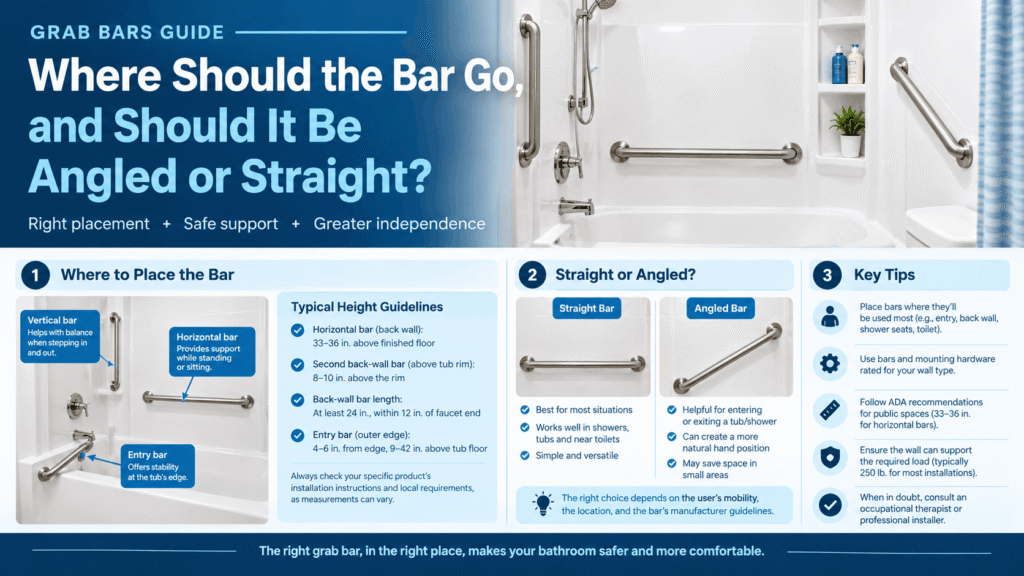
Put the top of the grip 33 to 36 inches above the floor, and choose horizontal for steadying or vertical for stepping in. For a tub, the ADA benchmark adds a lower back-wall bar 8 to 10 inches above the rim.
Round bars should be 1¼ to 2 inches in diameter, with 1½ inches between the bar and the wall. Vertical bars aren’t required by the standards, though they help when stepping into a tub. Measure for the person using it; our guide to measuring bathtub grab bar height shows how. Angled mounting depends on the bar, so read its mounting sheet first.
What mistakes cause leaks, cracks and loose bars?
Most failures trace back to skipped checks, rushed drilling or missing sealant. Skipping sealant is the quietest mistake, because the damage stays hidden behind the panel.
| Problem | Likely cause | Fix |
|---|---|---|
| Panel cracks at the hole | Hammer action, heavy pressure, over-tightening | Stop, relocate the bar, ask the surround’s maker about repair |
| Stains or soft spots near a flange | Missing gasket or sealant | Remove, dry, reseal |
| Bar rocks after install | Wings not seated, or cavity too shallow | Remove and recheck; see why a bathtub grab bar is loose |
| Fastener won’t open | Stud or obstruction in the footprint | Probe with a wire; move the spot |
| Leftover holes from an old bar | Previous mounting | For fiberglass, see filling grab bar holes in a fiberglass shower; for acrylic, ask the surround’s maker which filler suits |
| “500-lb” bar pulls out | The wall is the weakest link, not the bar | Re-check the whole system |
Which fastener suits an acrylic surround?
Choose the fastener first, then a bar that works with it. WingIts’s GBW40 data sheet lists acrylic tub surrounds by name, while the Moen sheet excerpt reviewed names of fiberglass.
A hollow-wall fastener such as the WingIts GBW40 [AFFILIATE LINK: WingIts GBW40 grab bar fastener] is the equipment this job calls for. It is stainless steel, ships with a 4-inch screw, and is designed for a cavity of 3½ inches or more. Confirm the bar’s flange fits before you buy. If you buy through our link, we may earn a commission at no extra cost to you.
For bar comparisons, our roundup of the best grab bars for fiberglass showers compares bars and mounting kits by wall type. It was written for fiberglass, so confirm your acrylic listing before buying.
When should you call a professional?
Call one if you can’t confirm what sits behind the panel. If you cannot confirm what’s behind the panel, hire help before drilling.
Also call one if the material or thickness is unknown, the cavity is shallower than 3½ inches, or the wall is cracked, soft, or wet. The same goes if the person will put full body weight on the bar or has a high fall risk.
FAQs
Can grab bars be added to acrylic shower walls?
Yes, in some cases. Acrylic walls are thin and can flex, so the bar needs hardware its maker lists for acrylic surrounds, or solid backing behind the panel. WingIts, for example, lists ¼-inch acrylic and fiberglass tub surrounds for its GBW40 fastener, and Moen’s sheet lists ⅛- and ¼-inch fiberglass. Check thickness, open space and condition first; if any check fails, don’t drill.
What are the best grab bars for acrylic showers?
The best bar is one that works with a fastener approved for your surround, because the mounting hardware decides whether it holds. Pick the fastener first, confirm it lists your wall’s material and thickness, then choose a bar whose flange fits it. Our roundup of the best grab bars for fiberglass showers compares bars and mounting kits by wall type, and the wall-first logic carries over.
How do you install grab bars in a ceramic tile shower?
Fasten the bar into a stud, wood blocking or a grab-bar-rated anchor, never the tile alone. Use a carbide or diamond tile bit at low speed with hammer mode off, and seal every hole. Tape over the spot to stop the bit wandering. Our guide to installing a grab bar on tile shower walls walks through all eight steps.
Should grab bars be angled or straight?
Neither wins everywhere. In covered public spaces the ADA standards require horizontal bars at 33 to 36 inches, and the U.S. Access Board notes vertical bars help when stepping into a tub or shower, though the standards don’t require them. Angled mounting depends on the bar: some are approved only for certain orientations, so read the mounting sheet before you mark holes.
Will drilling crack an acrylic tub surround?
It can, especially with the wrong bit, hammer action or an over-tightened fastener. Tape the spot, drill at low speed with light pressure, and stop if you see a hairline crack start. Use only the hole size your fastener’s sheet names; WingIts’s GBW40 calls for a 1¼-inch hole. If the panel is brittle or damaged, don’t drill.
How much weight should a grab bar hold?
The ADA benchmark is 250 pounds of force applied at any point on the bar, fastener, mounting device, or supporting structure, according to the U.S. Access Board. The ADA generally doesn’t cover private homes, but it’s a useful target. A bar listed at 500 pounds only reaches that on a wall that can carry it, so the weakest link sets the real limit.
Can suction-cup grab bars replace a mounted bar on an acrylic wall?
No, not if anyone pushes up from the bar. The suction bars reviewed in our seniors guide all state in their own listings that they’re balance aids and not weight-bearing supports, and they hold only on smooth, airtight surfaces. If your surround can’t take a mounted bar, ask an installer or occupational therapist about alternatives.
What to do next
- Ready to shop? Compare bars and mounting kits in our best grab bars for fiberglass showers roundup.
- Already installed and wobbling? Diagnose it with why a bathtub grab bar is loose.
- Choosing for an older adult? Start with our best grab bars for seniors comparison.